Observation details
You can specify details of an observation by filling in the observation fields. Only selecting the species name is required, all other data fields have defaults.
Species

The species field will have “Choose a species” text as placeholder, or holds a species name. Click on the species field to go to the species selector. You will see the list of species for the current list. When you want to switch to another list, click on “List” in the upper right corner. You will see the available species lists with the current list checkmarked. You can select a different list and return to the species selector holding names from the now current species list.
See Manage species lists for adding a new species list.
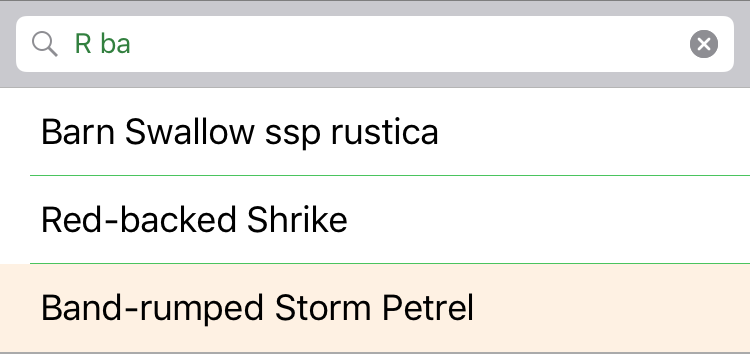
Usually a species list is very long. Scrolling to the correct species name would not be practical. You may first want to filter the list. You can do this by clicking on the search bar, and type in the filter text. You can add multiple search terms separated by space. Each term will match to the start of a name part. Say you want to search for “Red-backed Shrike”, typing “r ba” will most likely give you the species name near the top of the results:
Dismissing the keyboard can be done by pressing “Search” on the keyboard or by scrolling the list.
You can confirm your choice by clicking on the species name. You will return to the entry screen with the selected species name filled in.
Note that the filter text is preserved during the observation entry. If you clicked on the wrong species, you can tap on the species name again, get the list filtered with the same search text and select the correct entry.
The species list can display the species names in the local language, scientific name or both. When displaying both, the filter text applies to both names as well. You can change the preference for displaying species names for a list in Menu/List. See also Manage species lists.
Note that species in the species selector can have a colored background. This is very light orange for a rare species, and stronger orange for a vagrant. Not all species lists have this information.
Number

You can enter a count in the number field. The default value is 1. You can click on the number and enter a new number through the keyboard, or increase or decrease the number by using the plus or minus buttons. You cannot enter a lower number than 1.
Note that you can specify multiple numbers for a single observation, to indicate different genders, appearances or activities, see Sub counts.
Gender

Gender can be entered as unspecified, which is the default, or male or female.
Appearance

You can select an appearance for the selected species by clicking on the “Appearance” value. This will present a list that is specific for the species group of the selected species. In other words, for a bird you’ll get a different list than for a mammal. Click on an item in the list to select it and return to the observation entry screen.
The top entry in this list is the default value for appearance, unless locking is active, see Lock input. You can change this default by clicking on “Appearance” and then on “Change” in the upper right corner. All entries will get handles. You can drag an item by the handle to a preferred location in the list. You can sort the list to your own preference. The first item is the default value. When you’re done with sorting, press “Done” in the upper right corner. The appearance list is specific for a species group, and the custom sorting is remembered per species group as well.
Note that when your current species list is a group containing different species groups, see Manage species lists how to create such a group, you will first have to select a species before you can set or change the appearance. Also, when you change the species to one of a different species group, the appearance value will be reset to the default for that species group.
Activity

You can select an activity for the selected species by clicking on the “Activity” value. This will present a list that is specific for the species group of the selected species. In other words, for a bird you’ll get a different list than for a mammal. Click on an item in the list to select it and return to the observation entry screen.
The top entry in this list is the default value for activity, unless locking is active, see Lock input. You can change this default by clicking on “Activity” and then on “Change” in the upper right corner. All entries will get handles. You can drag an item by the handle to a preferred location in the list. You can sort the list to your own preference. The first item is the default value. When you’re done with sorting, press “Done” in the upper right corner. The appearance list is specific for a species group, and the custom sorting is remembered per species group as well.
Note that when your current species list is a group containing different species groups, see Manage species lists how to create such a group, you will first have to select a species before you can set or change the activity. Also, when you change the species to one of a different species group, the activity value will be reset to the default for that species group.
Remarks
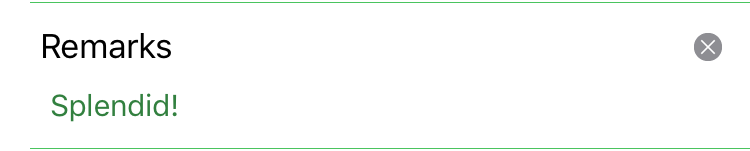
You can add any additional notes, clarification, identification description as remarks. Click on the field and start typing away. There is no limit on the length of the text. As soon as you have typed text, a Clear button will appear to clear all input.
The default value is empty unless locking is active, see Lock input.
Certain

Per default, an observation is marked as “Certain”. When you are not sure the identification, you turn off “Certain”.
Note that there is a preference setting for preventing uploading uncertain observations. This enabled you to upload everything that you are certain of, and then later check out and possibly correct the uncertain ones. See “Upload includes uncertain observations” in Preferences.
Escape

You can indicate that a species is not wild by selecting “Escape”. Per default this is off. Note that after uploading a species can be marked on the portal as escape regardless of this setting, when the species itself is considered as introduced for the specific location.
Date and time
Normally, iObs will use the current time for a new observation. You can change the time of the observation by using the time button  on the top bar. Clicking this button will open a new field which shows the time.

Clicking on this field will show a date and time chooser where you can enter a different value:
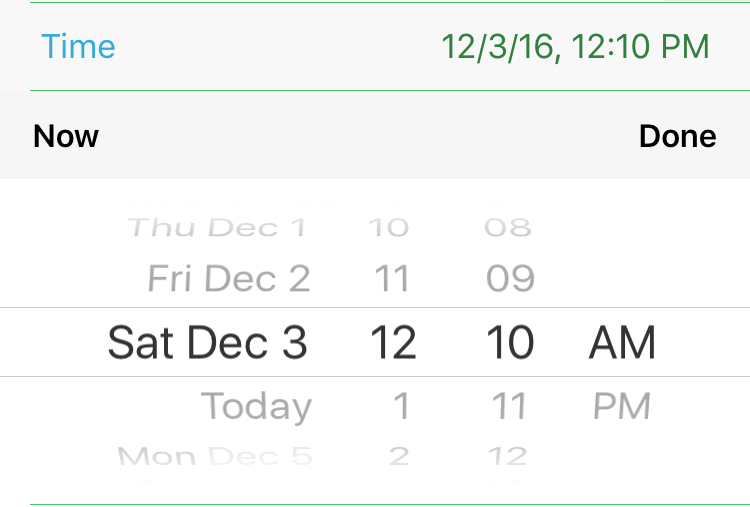
Note that when you specify a custom time, iObs will use this custom time for future observations as well. The custom time is remembered across saves. This is indicated by a blue color of the time icon, and also the locked state of the time field. You can reset this and use current time again by opening the time chooser again, and click “Now”. This will close both the chooser and the time field. Alternatively, you can use the reset icon  on the top bar, which will switch to both current time and current position and reset protection.
Preferences has an option to warn you that you are using a custom position, time or protection setting for more than an hour. This prevents you from accidentally entering observations with a custom time for a long time. See “Warn about locked time or position” in Preferences.
Position
Normally, iObs will use the current GPS position for an observation. You can change this by using the location button  on the top row. Clicking this button will show the map screen. You can enter a custom position by press and hold on a location on the map until a pin appears. To return to the entry screen, click “Add” in the top right corner. See Use the map for a further description of the possibilities of the map screen.
Note that when you specify a custom position, iObs will use this custom position for future observations as well. The custom position is remembered across saves. This is indicated by a blue color of the position icon. You can reset this and use current position again by clicking the location button and opening the map screen again, then delete the custom position by clicking on the delete-icon  on the marker’s label and return by clicking on “Add”. Alternatively, you can use the reset icon on the top bar, which will switch to both current time and current position and reset protection.
Preferences has an option to warn you that you are using a custom position, time or protection setting for more than an hour. This prevents that you are accidentally entering observations with a custom position for a long time. See “Warn about locked time or position” in Preferences.
Protection
Sometimes you want to enter an observation, but not disclose the full details because of a sensitive situation. You can click on the “Protect” icon on the top bar. This will open two fields that will give you options for protecting an observation:

When you set Obscure to enabled, the position of the observation will be shown on the public portal site as 1x1km grid point. When you set Embargo, the observation will be hidden until the embargo data is reached.
When you enable Embargo, an embargo date field appears which shows the current value. Per default this is set to one year into the future. You can change this value by clicking on it. An embargo date chooser appears, and you can choose a different embargo date.

Note that when you upload a protected observation and then look this up on the portal while being logged in, you will always see the full details of your own observations. If you want to see if the observation is properly protected, you should logout on the portal and then check again your observations.
Note that when you specify protection, iObs will use this protection for future observations as well. When you want to protect a situation, it makes sense to protect all observations done in this situation. The protection is remembered across saves. This is indicated by a blue color of the protection icon. You can turn off the protection by opening the protection settings again and turn off both options. Alternatively, you can use the reset icon on the top bar, which will switch to both current time and position and turns off protection.